How to Make a Video Essay in Final Cut Pro (2026 Workflow)
A video essay is a persuasive argument told with narration and visual evidence, and in practice most of the work happens before and after you touch the timeline. If you edit in Final Cut Pro (FCP), you already own one of the fastest editors on the Mac. What you need is a repeatable workflow around it, because the thing that stalls most essays isn't talent or software. It's the long, mechanical stretch between "I have a finished script and a voiceover" and "I have a rough cut I can actually judge."
This guide walks through the whole pipeline in the order you'll do it: thesis, script, voiceover, shot list, rough cut, pacing, sound, graphics, export. It's written for Final Cut Pro on a Mac, and where a step can be done the slow way or the fast way, we show both.
In this guide
- What a video essay actually is
- Five decisions before you edit
- Write the script for the ear
- Record a clean voiceover
- Turn the script into a shot list
- Assemble the rough cut in Final Cut Pro
- Pacing and retention
- Sound and music
- Graphics, archival footage and on-screen citations
- Export, title, thumbnail and chapters
- A realistic time budget
- FAQ
What a video essay actually is
A video essay is a structured piece of visual storytelling built around an idea, argument or analysis. Leadde's 2026 guide breaks it into five ingredients: a clear thesis, spoken narration, visual evidence, pacing designed for retention, and a storytelling structure. The same source makes a distinction worth keeping in your head all the way through production: a slideshow illustrates, while a video essay persuades. An essay is "a visual argument designed for watching", not a written essay with pictures laid over it.
That framing matters for editing because it tells you what the picture is for. Every shot on your timeline should carry part of the argument. Decoration is what makes a narrated slideshow feel amateur.
Video essays are also not a niche. YouTube reports roughly 2.72 billion monthly logged-in users, and 60% of US watch time now happens on TV screens (a 2026 secondary summary of platform data). Long-form, lean-back viewing is exactly where a well-edited essay lives.
A word of realism, from the same source: the median monetized channel earns roughly $4,800 a year, while the top 10% earn $42,000 or more. A good workflow won't guarantee an audience, but it does decide whether you can publish consistently enough to find one.
Five decisions before you edit
Almost every edit that "isn't working" is a pre-production problem in disguise. Settle these five things first.
- Thesis. One sentence that creates tension. Leadde's example: "AI is changing video production" is weak; "How AI eliminated the traditional video editing bottleneck in 2026" is strong because it claims something you can prove or disprove. If you can't say it in a sentence, you don't have an essay yet, you have a topic.
- Tone. Analytical, wry, investigative, elegiac? Tone decides your music, your pacing, and how much you can lean on humor in the cutaways.
- Length target. Be honest about your capacity. Spoken narration runs at around 160 words per minute by one common benchmark, so a 10-minute video is roughly 1,600 words and a 20-minute video roughly 3,200. Pick the length your argument needs, then budget the editing accordingly.
- Sources and rights. Decide now what you can show. Original footage, licensed stock, public-domain archives, screenshots under fair use, your own graphics. Rights problems found at export are the most expensive kind.
- Format. Face on camera, voice only, or a hybrid? This guide focuses on the voice-over-visuals format, which is the one where alignment work dominates the edit.
Keep research on a leash. Leadde calls out "analysis paralysis" as a recurring failure: 40 tabs, endless notes, never producing anything. Its rule is a good one: if research doesn't directly support your thesis, cut it. Build the skeleton (intro, three arguments, conclusion) first, then research only to fill gaps.
Write the script for the ear, not the page
Written prose sounds unnatural out loud. "Historically speaking, one may reasonably conclude…" becomes "Here's what changed." Read every paragraph aloud, and rewrite whatever makes you stumble.
A structure that holds attention, adapted from the retention-focused guides above:
- Hook (first ~30 seconds). A bold claim, an unexpected question, a contradiction, or a strong promise.
- Context (next ~60 seconds). Why this matters and what problem exists.
- Core argument sections. Break the middle into segments, each with its own mini-payoff.
- Payoff. Answer the thesis clearly. Don't end vaguely.
Use a two-column audio-visual script
The best video essayists don't write first and panic about visuals later. They write the script with the pictures beside it. Leadde describes the same discipline: "Do not ask 'what image fits this sentence?' Ask 'what visual experience makes this argument obvious?'"
Use a simple two-column table, one row per spoken sentence (the rows below are an invented example, purely to show the format):
| # | Narration (what you say) | Visual (what we see) |
|---|---|---|
| 1 | "In 2019, a single spreadsheet error cost a city $24 million." | Close-up of a spreadsheet cell, red highlight |
| 2 | "Nobody noticed for three years." | Calendar flipping, archival footage of the council chamber |
| 3 | "Here's how it happened." | Title card with the essay's thesis |
One row per sentence is not a style choice. It's the structure that makes the rest of this workflow almost mechanical. When each sentence has exactly one visual, your shot list is your timeline plan.
Record a clean voiceover
Leadde's research puts it bluntly: viewers tolerate imperfect visuals far more readily than poor audio. Narration that sounds echoey, monotone, rushed or inconsistent undermines even a beautifully shot essay.
A practical checklist:
- Room first, mic second. A closet full of clothes beats a $400 microphone in a bare room. Soft surfaces kill reflections.
- Record at 24-bit / 48 kHz (the standard for video). Keep your input gain conservative so peaks never clip. You can always add gain; you can't remove distortion.
- Read for pacing. Leave a beat of silence between sentences. Those gaps become your cut points and your breathing room, and they make the later alignment step dramatically cleaner.
- One sentence, one idea. If a sentence carries two ideas, split it in the script. You'll thank yourself when you assign visuals.
- Do pickups, not re-records. Mark flubs with a clap or a spoken "pickup," and re-read just that line.
Export the finished narration as a single audio file (WAV is ideal). That one file becomes the spine of the whole edit.
Turn the script into a shot list
Now convert your two-column script into a shot list: one visual asset per narration sentence, collected and named in order.
B-roll that shows the thing being said
Editing guides consistently make the same point about B-roll: it should carry the story, not decorate it. Monitor YT's editing-for-retention guide describes B-roll as part of how editing removes "every reason a viewer has to look away." Ask of every shot: does this show what the narrator just said, or does it show something merely adjacent?
Good sources for essay visuals, roughly in order of preference:
- Footage you shot yourself.
- Primary-source material: screenshots, documents, archival footage, interviews.
- Public-domain and Creative Commons archives (check each license).
- Licensed stock, for filler beats only.
- Original graphics: maps, charts, diagrams.
Name your files in order
This is the step that pays off in the next section. Rename every asset with a zero-padded sequence number that matches its row in the script:
001_hook_spreadsheet.mp4
002_calendar.png
003_council_archive.mov
004_thesis_card.png
…
062_outro.mp4
Zero-padding (001, not 1) makes the files sort correctly everywhere: in Finder, in FCP's browser, and in any tool that reads the folder. One number sequence for clips and stills, no gaps, in the exact order they appear. It feels fussy for ten minutes and saves you hours.
Assemble the rough cut in Final Cut Pro
The rough cut is where an essay stops being a plan and becomes a video. It's also the most mechanical part of the job, and the one where most projects stall. Leadde notes that "many video essay projects stall" because creators "underestimate how much time traditional editing requires."
Here are the two ways to build it.
The manual way: drag and trim every clip to its line
This is how most FCP editors do it, and it works. A typical Reddit answer to "Best way to add B-roll on top of VO?" is the standard method: lay the voiceover on the primary storyline, then attach B-roll as connected clips above it, trimming each to the line it illustrates.
- Create a new project in a new event. Set the project to match your delivery format (for YouTube, 1920×1080 or 3840×2160 at your footage's frame rate).
- Import the voiceover and all media. Keep the numbered naming intact.
- Put the voiceover on the primary storyline.
- Play the voiceover, note where each sentence starts, and set markers (press M) so you can see the boundaries.
- For each sentence, drag the matching clip above the voiceover, connect it at the marker, then trim its tail to the next marker.
- Repeat for every row of your script.
For a 60-sentence essay that's 60 placements and 60 trims, around 120 precise edits before you've made a single creative decision. This is the work a video essayist describes when they say a 20 to 25 minute essay can take 2 to 3 weeks of evenings (a r/PartneredYoutube thread; the same community reports roughly 2 hours of research plus 5 to 10 hours of scripting for that length).
The fast way: a numbered folder becomes a timed sequence
If you followed the naming convention above, the alignment step is already data. You have N narration sentences with start and end times, and N numbered assets. Pairing them 1:1 is a deterministic job, not a creative one.
That's exactly what MatchCut FCP does. It's a Mac app that:
- Transcribes your voiceover on your Mac (using whisper.cpp, a C/C++ port of OpenAI's Whisper that runs offline) and splits it into sentence-level caption blocks with start and end times, saved as an
.srtfile. - Pairs your numbered folder with those blocks, asset 1 to caption 1, asset 2 to caption 2, and so on.
- Exports a Final Cut Pro XML (FCPXML 1.9) sequence where each asset sits at the start of its caption and runs until the next one starts, with no gaps.
Then you import it the standard way: File → Import → XML (Apple documents this in Use XML to transfer projects). FCP builds an event and a timeline with every asset already aligned to your narration. You spend your time on the creative questions: is this the right shot, is this beat too long, does this transition land?
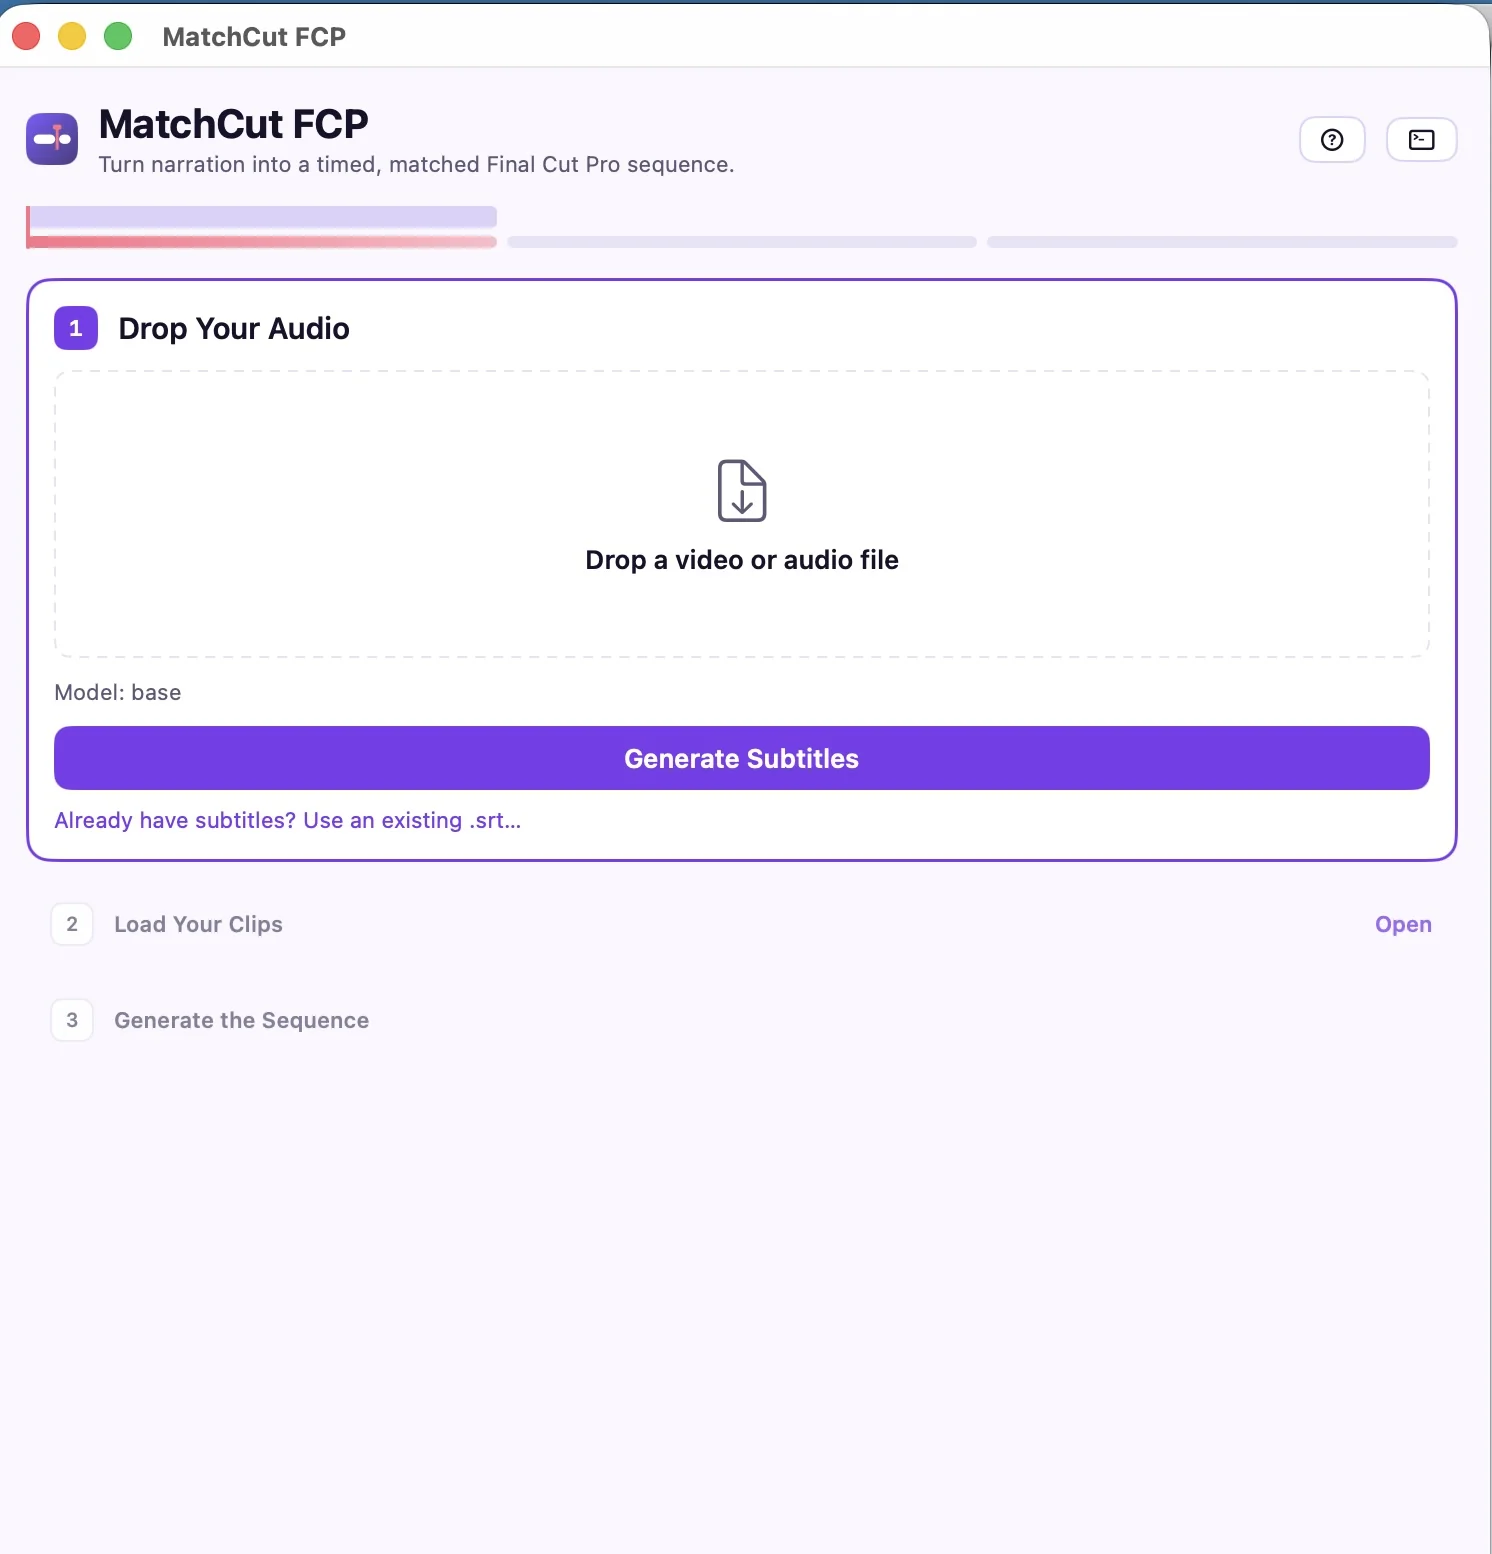
What MatchCut doesn't do, and we'd rather say it plainly: it doesn't write your script, pick your footage, or generate images or video. It replaces the placement and trimming, not the judgment. You still need Final Cut Pro, an Apple Silicon Mac (macOS 12+), and your own media. The step-by-step help article covers the whole flow, and we go deeper on the method in How to Align B-Roll and Images to a Voiceover Automatically.
Subtitles are always free, and the first two successful FCPXML exports are free, so you can test it on a real essay before paying. Full access is $19 for early access.
Check the rough cut
Whichever route you took, do a verification pass before finishing:
- Scrub the whole timeline with the voiceover. Does each visual appear on its sentence?
- Mark shots that are boring, wrong or too long. Don't fix them yet; note them.
- Replace placeholders (flat cards, temporary stills) with the real visuals.
- Confirm total duration is within ~10% of your target.
Only now do you start finishing, because every decision after this point sits on a stable structure.
Pacing and retention
A rough cut is correct. A good cut feels alive. The most useful idea from retention editing is the pattern interrupt: any deliberate change that resets attention, such as a cut to B-roll, a zoom, an on-screen caption, a sound effect, or a shift in framing. Monitor YT explains that attention decays even for interested viewers, and that a pattern interrupt "does not add information. It refreshes attention so the next piece of information" lands. Pixxelpulse frames them as "rhythm, not decoration."
Practical rules for essays:
- Cut on sentence boundaries, then vary the shot length inside the sentence if it's long.
- Vary shot duration. A string of identical 4-second holds becomes a metronome. Mix 1.5-second cutaways with 8-second holds on key evidence.
- Remove dead air. A half-second pause is breathing; two seconds of nothing is a lost viewer.
- Reset at predictable drop-off points, such as the end of the hook and the transition into each new section.
- Don't over-cut. Both Monitor YT and TubeAI's pattern-interrupt guide warn that too many interrupts make a video feel chaotic and can hurt retention.
In FCP, the quickest pacing tools are the blade (B), the Range tool (R), retiming (Command-R), and simple Ken Burns moves on stills. Add a subtle scale animation to static images and they stop reading as slideshow.
Sound and music
Sound is half the experience of narration-led video.
- Clean the voiceover. Apply noise reduction sparingly and try FCP's Auto Enhance Audio (in the Enhancements menu below the viewer) only as a starting point. Add a gentle compressor and a de-esser if sibilance is harsh.
- Duck the music under speech. Put music on a connected audio lane and use volume keyframes to bring it down roughly 12 to 18 dB whenever the narrator speaks.
- Use stingers and risers sparingly, at section changes. They're pattern interrupts for the ear.
- Keep room tone. Add a few seconds of the room's ambient sound under the entire voiceover to avoid "dead silence" gaps when you cut.
- Target loudness around −14 LUFS integrated for YouTube-style delivery (check the platform's current guidance and verify with a loudness meter).
Graphics, archival footage and on-screen citations
Credibility is an essay's currency. Show your sources on screen:
- Lower-third source cards ("Source: City Audit Report, 2019") for each key claim.
- Highlight the exact passage in screenshots rather than showing a full page.
- Keep graphics consistent: one font family, one accent colour, one animation style.
- Credit archival and licensed footage in the description and, where the license requires, on screen.
Putting your references in the video's description is also good for viewers and for search, and it forces you to keep a clean sources list while you write.
If you use AI voices or synthetic imagery, know the rules. YouTube requires you to disclose realistic altered or synthetic content, and the YouTube Partner Program has its own eligibility rules. Original commentary and genuine editorial work are what keep an essay on the right side of both.
Export, title, thumbnail and chapters
- Export with File → Share → Master File or your YouTube preset, H.264 or HEVC, at your project resolution.
- Title with the thesis's tension, not just the topic. "How a Spreadsheet Error Cost a City $24 Million" beats "My Thoughts on Spreadsheets."
- Thumbnail. One clear subject, a few words at most, strong contrast.
- Description. Open with the thesis, add your source list, then chapters: timestamps starting at 0:00, each on its own line, with at least three chapters and each at least 10 seconds long.
- Captions. Subtitles help accessibility and search. On Apple Silicon Macs, FCP can generate captions automatically, though Apple's current documentation notes it requires Apple silicon and is available in U.S. English only. You can also reuse the
.srtMatchCut FCP already created from your voiceover.
A realistic time budget
Here's how a 15 to 20 minute essay tends to break down. These are planning ranges assembled from the cited sources, not guarantees; your pace will vary with experience and with how scripted your visuals are.
| Phase | Typical effort | Where the time goes |
|---|---|---|
| Research | ~2 hours up to several days | Reading, source collection (r/NewTubers reports ~2 h for a 20–25 min essay on a known topic) |
| Script | 5–10 hours | Drafting, reading aloud, the two-column visual pass |
| Voiceover | 1–3 hours | Recording, pickups, cleanup |
| Visual collection | 3–8 hours | Shooting, sourcing, naming |
| Rough-cut assembly | Manual: many hours to days | Placing and trimming each clip against the VO |
| Finishing | 3–8 hours | Pacing, sound, graphics |
| Export and publish | 1–2 hours | Title, thumbnail, chapters |
For context on the manual-assembly row: industry estimates put editing a typical 10-minute YouTube video at 2 to 3 days, and 15 to 30 hours for heavily edited pieces. A large part of that is mechanical placement, which is exactly the part you can automate if your assets are numbered and your narration is split cleanly into sentences.
FAQ
Can I make a video essay for free? Yes. DaVinci Resolve is a capable free editor, and iMovie and CapCut are free as well. If you already own Final Cut Pro, you have everything you need for the edit itself; the free-tool trade-off is mostly time and polish.
Is Final Cut Pro or Premiere Pro better for video essays? Both do the job. Final Cut Pro's magnetic timeline and connected clips suit B-roll-over-voiceover work well, and it's a one-time purchase rather than a subscription. Premiere Pro offers text-based editing and a broader cross-platform ecosystem. Pick the one you'll actually finish projects in.
How long does a video essay take to make? Video essayists in r/PartneredYoutube report 2 to 3 weeks of evenings for a 20 to 25 minute piece. Expect your first one to take longer, and your fifth to take noticeably less once your naming, scripting and assembly routines are settled.
How long should a video essay be? As long as the argument needs, and no longer. At about 160 spoken words per minute, a 10-minute essay is about 1,600 words. Cut anything that doesn't serve the thesis.
Can AI make the video essay for me? AI tools can speed up scripting, voice and rough assembly, and they're improving fast. But the thesis, the argument and the editorial judgment are what make an essay worth watching, and they're yours. Tools like MatchCut FCP automate the mechanical alignment of your media to your voiceover; they don't generate footage or write the script. If you're weighing cloud AI video generators against an editor-first workflow, see MatchCut FCP vs AI Video Generators.
Does Final Cut Pro sync B-roll to audio automatically? Not natively. FCP syncs clips that share the same take, but it has no feature that places B-roll against a voiceover by sentence. See Does Final Cut Pro Auto-Sync B-Roll to Audio?.
Where to go next
- Automate the alignment step: How to Align B-Roll and Images to a Voiceover Automatically
- Compare the transcript-editing options: MatchCut FCP vs Descript, Cutsio & Builder NLE
- See it in action: the product tour and the rough-cut help guide
MatchCut FCP turns a voiceover and a numbered folder into a timed Final Cut Pro sequence in minutes, on your Mac. Download the beta (subtitles are free, and so are your first two exports) or get early access for $19.
Sources
Product claims about MatchCut FCP are from the help center and FAQ. External sources, accessed 2026-10-16:
- Apple — Use XML to transfer projects (Final Cut Pro User Guide)
- Apple — Generate subtitles automatically in Final Cut Pro
- Google/YouTube — Disclosing altered or synthetic content · YouTube Partner Program
- Leadde — How to Make a Video Essay: Step-by-Step Guide (updated 2026-05-18)
- Monitor YT — Editing for Retention: Pacing, Pattern Interrupts, B-roll (2026-06-21) · Pixxelpulse retention guide · TubeAI pattern interrupts
- Digital Applied — YouTube Statistics 2026
- Reddit — r/PartneredYoutube: video essayists' workflow · r/NewTubers: time cost of a video essay · r/finalcutpro: B-roll on top of VO
- Tom Kim — LinkedIn: editing time for a 10-minute video · Gling — How long does it take to edit a YouTube video
- ggml-org — whisper.cpp